
|
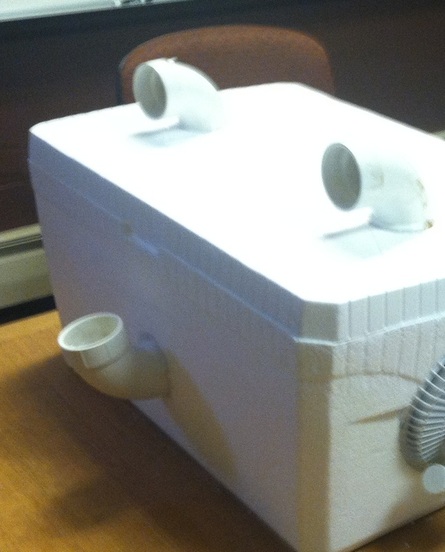
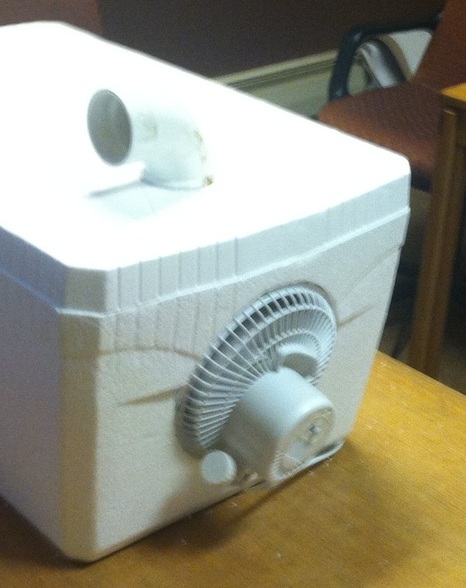
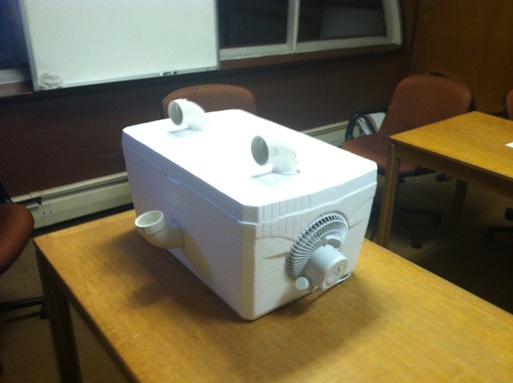
Sometimes fans won't cut it. That’s the conclusion the staff and students of YouthBuild New Bedford came to after two heat waves and twelve days above 90 degrees. It was a conclusion that led them to a fairly simple and cost-effective solution to their problem: build an air conditioner. You’re probably thinking, “That’s hardly a simple solution. An air conditioner is a complex machine.” It’s not. Really, the following step-by-step guide will prove it. So if your fans and open windows aren’t getting the job done, and there’s no room in your budget for central air (HA!), this DIY A/C guide will save you from some embarrassingly sweaty days come the next heat wave. Materials: 1 Styrofoam cooler 1 Small fan 3 elbow PVC pipe fittings 10 lbs ice 1 Utility knife Before you continue: Warning: Author lacks graphic design skills. Any questions regarding this post can be addressed to: [email protected] Step 1: Using a marker, trace two evenly spaced circles equal to the circumference of your PVC pipe fittings on the cover of your Styrofoam cooler, and one in the middle of its front, like so: 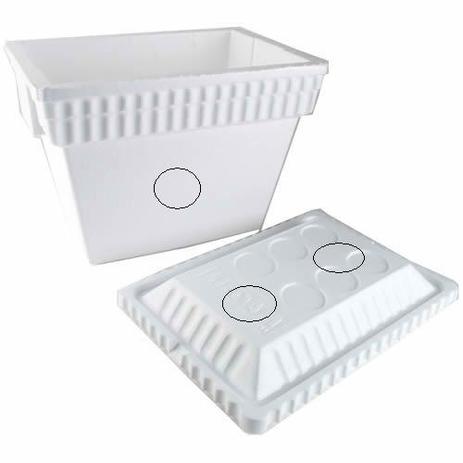 Note: The location and number of PVC pipes can vary depending on personal preference. (Some DIY A/C’s use as little as one, others show as many as three – all in numerous locations.) Step 2: Trace a hole equal to the circumference of your fan on the side of your cooler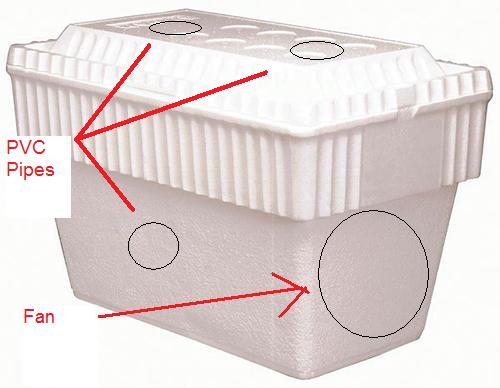 Note: The location of your fan can also vary (side, back). Step 3: Cut out every traced hole, for the pipes and fan, using your utility knife 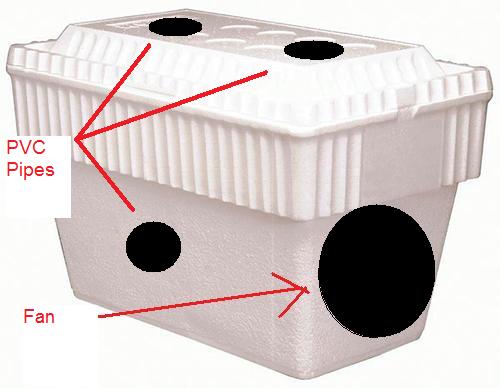
 Note: If you don’t want to keep buying ice, you can use ice packs, or fill some water bottles and freeze/re-freeze them as needed.
 Note: The air won't be cold right away. Be patient, it'll be worth it.
Like Mass YouthBuild Coalition on Facebook | Follow Mass YouthBuild Coalition on Twitter
2 Comments
1/26/2024 04:02:15 am
Thank you for the opportunity to provide feedback. Dunkin Donuts is a popular and well-loved establishment, and I appreciate the chance to share my thoughts. The survey at https://www.dunkinrunsonyou.com.co/ is a great way to express my opinions and potentially win a free donut. I value the opportunity to have my voice heard and look forward to continuing to support Dunkin Donuts. Your commitment to customer satisfaction is commendable. Leave a Reply. |